
Paver Systems

WHY PAVERS?
A lot of the time, we hear clients say they are deciding whether or not to install brick pavers or go with another product type (stamped concrete, tile, cool deck, etc). Here’s the deal, unless you simply cannot afford any of the products previously mentioned, including pavers, and you are forced to go with something very cheap like asphalt, crushed stone, or plain concrete, then your decision should be pretty straightforward. Construart Pavers is where it’s at!
Here’s a little pro and con list for brick pavers:
PRO’s
Same price or often cheaper than stamped concrete, tile, or concrete deck
Lifetime Warranty on pavers stones
Easy to repair
Arguably more aesthetically pleasing than stamped concrete, tile, and concrete deck
In short, pavers last longer, look better, and aren’t more expensive than other product options.
CON’s
More expensive than asphalt, flat concrete, or crushed stone

Benefits of Pavers
Pavers come in a variety of colors and patterns, giving the design-conscious homeowner a chance to dress up their outdoor living space. Unlike concrete slabs, pavers have the ability to match elements of the house, landscape design and other outdoor living features for a clean aesthetic appeal. Some of the biggest benefits of pavers include:
Increase your home’s curb appeal and property value
Lifetime guarantee against cracking or breaking
Durable in changing climates
Rated to 8,000 Psi (Concrete is only 1,500-2,000 Psi)
Easy to remove and replace without damage Non-slip surface, even when wet
Fade-resistant and easy to clean
OUR PROCESS

Step 1 – Prep the Area
Before the paver installation process begins, we conduct pre-demolition — locating all utilities (electric, gas, water, etc.) to prevent any problems during installation.
Demolition then takes place to remove your existing hard surface through the use of a Bobcat machine, demolition tools, and saw-cutting where necessary. This is typically needed along areas where your home’s foundation protrudes into the space where pavers are to be installed.

Step 2 – Place the Foundation
Placing the foundation includes excavation, grading (recommended to create necessary water flow away from your home) and sub-base compacting using a plate compactor to remove air gaps.
We then prepare the base with six inches of Class II Road Base for vehicular areas and four inches for the pedestrian areas. Once the base is set, it’s hosed down and compacted until a compaction level of 95% is reached.
Sand preparation then takes place with one inch of bedding sand laid down over the base.

Step 3 – Paver Installation
Once the area has been prepared and the foundation placed, we will lay string lines out from your house and lay the pavers according to the design plans.
Step 4 – Edging Installation
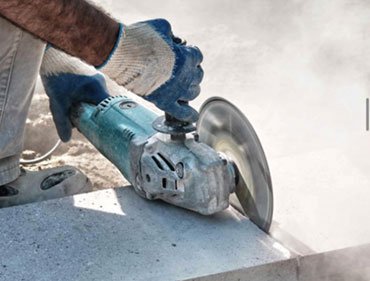
When the entire field of pavers has been laid, we will take the border stone of your choice and place it around the outside of the field — each cut with a wet saw to perfection and placed back in their appropriate location.
After all the borders have been cut, the areas underneath the border stones will be trenched, a concrete footing poured in the trenches and the border stones tamped down into place. Once the concrete finishes drying, any excess concrete on the sides is removed.

Step 5 – Adding and Compacting Joint Sand
After all the pavers have been laid, a plate compactor is used to compact all the pavers down into the bedding sand.
Sand is then brought up 1/4 inch on the stone, interlocking the stones. Additional sand is brought in to compact from the top down to completely fill all the paver joints.

Step 6 – Cleaning and Sealing
Once the joints have been completely filled with the sand, all excess sand and debris will be removed and the pavers hosed off.
Sealant is optional but recommended to lock in the joints and prevent weeds or any other growth from occurring between the pavers.
PAVER SYSTEMS
We combine organic beauty and functional utility in systems that are environmentally sound. Our Standard Pavers provide a wide range of styles, colors and textures for everything from a backyard patio to a community plaza. Permeable Pavers allow rainfall to pass between joints in the paver, reducing the impact on storm drains while filtering and cleaning runoff. Turfstone Grid Pavers are perfect for erosion control and soil stabilization and can be used to create a a grassy space for overflow parking or emergency vehicle access in public parks.
STANDARD PAVERS

We mimic the surface quality of natural stone with an array of affordable, low-maintenance shapes, colors, and textures. Whether you are designing an intimate setting or an expressive public plaza, Construart Pavers has the style and color palette to complement your creativity.
A-Edge restraint – may be wood, metal, plastic, or concrete
B-Joint sand – fine graded sand meets ASTM C 144 Dry Washed Plaster Sand
C-Paving stone – various shapes may have small spacers on the sides
D-Bedding Sand – graded sand meets ASTM C 33 Moist Washed Concrete Sand
E-Base layer – graded rock class II or 3/4 minus mix compacted
F-Geotextile – filter fabric as needed per site conditions
G-Compacted native soils
PERMEABLE PAVERS


Permeable pavers make it possible to have an attractive surface suitable for pedestrian and vehicular traffic while minimizing the impact of rainfall-runoff on storm drains and the surrounding environment. Where most paved surfaces are impervious and create immediate, contaminated runoff during rainstorms, permeable pavers allow runoff to flow between the joints of the pavers. The base layer of the paving system delays, filters, and cleans the runoff before it passes into the groundwater table or into the storm drain system.
A-Edge restraint – concrete depth below bedding rock
B-Joint rock – 1/8″ – 3/8″ crushed rock (no fines)
C-Permeable paving stone has spacers or void spaces to allow water flow
D-Bedding rock – 2″ thick layer, No. 8 stone
E-Base rock – depth varies, No. 57 stone open-graded
F-Subbase rock – depth varies, No. 2 stone
G-Geotextile – filter fabric for full or partial exfiltration; liner for no exfiltration
H-Drain pipe – as needed for partial or no exfiltration
I-Non-compacted native soils
TURF STONE GRID PAVERS

Turfstone offers specific and distinct advantages for controlling erosion and stabilizing slopes, embankments, river and low flow channels, flood plains, and the shorelines of inland rivers, dikes, creeks, lakes, ponds, and reservoirs, where there is no extreme wave action.
Turfstone can also be used to reinforce grassy areas subjected to wheeled traffic that would otherwise become so compacted as to inhibit the permeability of the soil that is necessary for the grass to survive. The Turfstone paving system is an ideal overflow parking facility for parks, historical sites, institutions, university and school campuses, and golf courses. Because Turfstone enables the traffic to go where the grass grows, it is suitable for emergency or maintenance vehicle access which must remain green space.
Compared to asphalt, grassed grid pavements can reduce surface air temperatures by 2° to 4° F (1° to 2° C) and radiometric temperatures by 4° to 6° F (2° to 4° C).
A-Edge restraint – may be wood, metal, plastic, or concrete
B-Soil mix with seed or sod plugs
C-Turfstone – concrete grid
D-Bedding sand – graded sand meets ASTM C 33 Moist Washed Concrete Sand
E-Base layer – graded rock class II or 3/4 minus mix compacted
F-Geotextile – filter fabric as needed per site conditions
G-Compacted native soils
Pricing
The cost of paver installation is based on square footage, materials, operations, labor, overhead and company costs.
Higher-end materials are based on which paver materials manufacturer you choose.